• Home
  • Recipes
    • Search All Recipes
    • Recipe Round-Ups
    • Weekly Meal Plans
  • More
    • About
    • Work With Me!
    • Lifestyle
    • Outside the Kitchen
    • Kitchen Tips & Gifts
    • Contact
    • Facebook
    • Instagram
    • Pinterest
    • Twitter

Framed Cooks

My life. One recipe at a time.

Want every new recipe delivered right to your email inbox?

Sign Me Up!
Recipes » How To Make Homemade Butter

How To Make Homemade Butter

By Kate Morgan Jackson

Jump to Recipe

Here is the best homemade butter recipe, made from organic cream in just ten minutes with your mixer or food processor.

Make your own homemade butter, you’re thinking?  Yes, I freely admit it…sometimes I wake up purely and simply obsessed with making something that is completely available in large stacks in the supermarket.  

A little while ago it happened to me with fresh ricotta, which one day I inexplicably NEEDED to make, and you know what?  It was easy, and fast, and fabulous.  

So when the urge to make homemade butter struck me, I did it.  I went all Laura Ingalls Wilder and Made My Own Butter.  And once again…easy, fast and fabulous.  Here’s what happened.

So, I’ve flirted with making butter for a while, because with the possible exception of bacon, there’s nothing I like better than really good butter.  

But for some reason, I thought it would be hard.  For one thing, I thought it would involve getting some of these.

And since one perpetually hungry dog is pretty much all I can deal with, those were out.  

But then I started asking around, and it turns out that all you need to make fantastic butter is some regular old heavy cream, a little sea salt, a stand mixer and about 15 minutes.  No actual farm animals required, at least not on the premises.  So, away we go!

First of all, the cream.  When I started my butter-making adventures, I spent a ton of time hunting down fresh cream that had been pasteurized as little as possible.  

I scoured farmer’s markets and Googled “local fresh cream” and thought again about the whole cow thing.  And when I finally tracked some down, it made great butter.  

Then I tried it with regular organic heavy cream from the supermarket and guess what?  It also made great butter.  So while I love a good farmer’s market outing, you can absolutely do this with regular organic heavy cream.

There are basically two ways to make butter and make it fast…with the mixer and the food processor.

First up, the mixer.

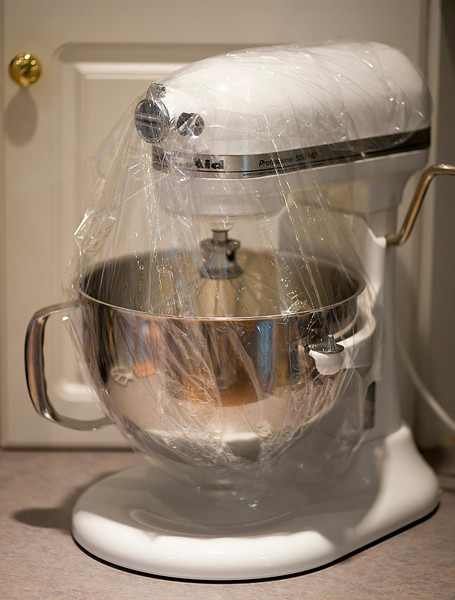
Pour two cups of cream into your mixer with the whisk attachment.  Now, here’s one of the most important things I learned: Cover Your Mixer. A dishtowel is your best bet, which I promptly figured out after my first try which involved swathing my entire mixer with plastic wrap.  

Not only will you be happy you did this at the beginning when the cream is still liquid, you will be even happier at the end when the butter solids separate from the whey and whey starts splashing out of the bowl.  Trust me.

Now, crank that mixer up to high and let it rip.  After a few minutes your cream will start looking like fresh whipped cream.  (By the way, YUM.)  Then it will look like fresh whipped cream that has been whipped a little too long.  Then after about 8 or 10 minutes it will look like this.

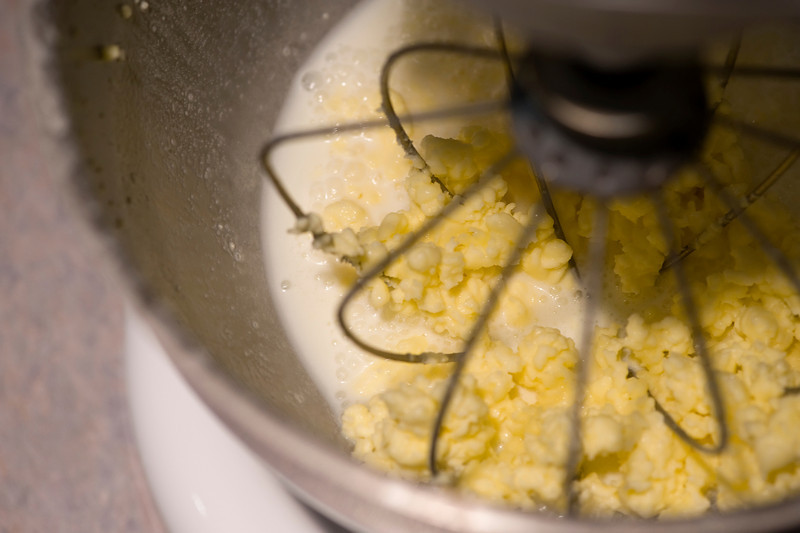
There will be all these lumpy looking chunks floating around in something that looks like watery milk.

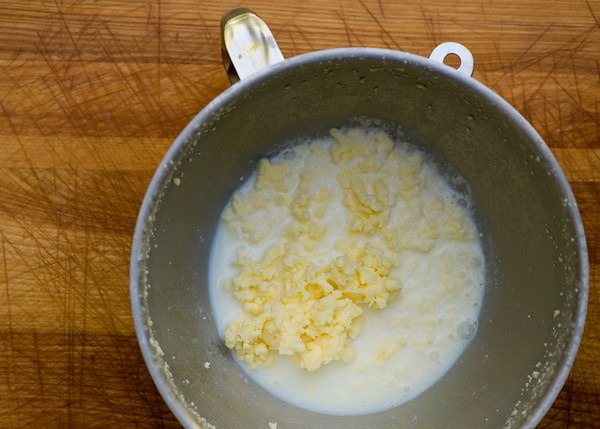
This, my friends, is BUTTER!  Now comes the fun part.  Pour it all into a strainer, letting the liquid drain off of the solids.  

(I always keep the liquid around for a little while, wishing there was something I could do with it, but it’s not regular cultured buttermilk and so far I haven’t figured anything out, so I eventually give it to the dog, who then acts like she has won the lottery.)

Now, if you would rather try this in a food processor it is exactly the same process (except it takes a little less time to go from cream to a solids/liquids state, and all the splashing stays inside).

Whether you have used a mixer or a food processor, it’s time for the next step.

Pick up the solids and squeeze it in your hands until you have gotten as much of the remaining liquid out as you can.  At this point I know that some folks rinse it in ice water.  I don’t.  I like the taste of it exactly as is, but try it both ways and see what you think.

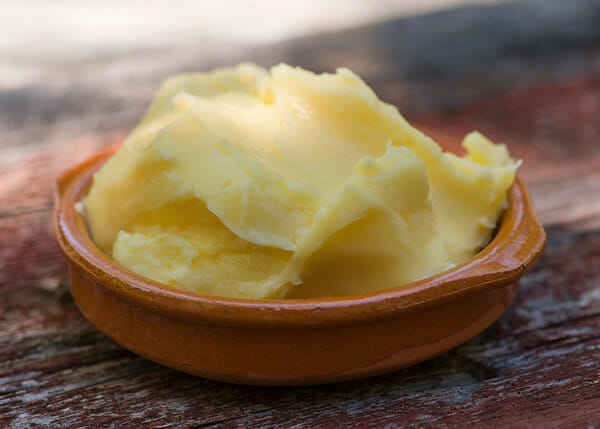
Now, if you like your butter unsalted you are all done.  If you are a salted butter lover like me, take about 1/4 teaspoon of sea salt and sprinkle it on top of your butter and squish it around some more.  

Taste a little and see if it’s salty enough for you…if not, add more in 1/8 teaspoon increments until you like it.  And voila!  Butter.  Butter!!  

You could even take things a step further and add in some nice fresh chopped herbs, and then you will have herb butter!!!  It’s almost too much to take in.

I have only two more things to add.  First, now that you have spent a little time squeezing butter with your hands, even after you wash them you will be amazed at how smooth and soft they feel…butter-making side benefit.  And the other thing is that once you have made your own butter, you pretty much have to make this to go with it.

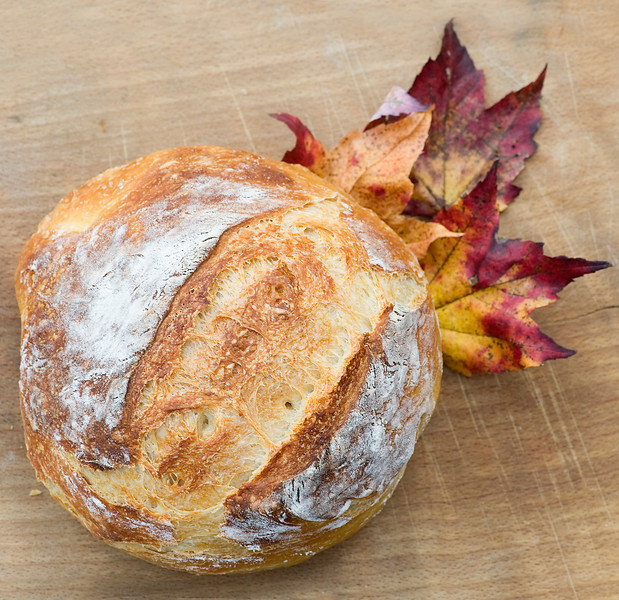
Warm crunchy bread that requires almost no kneading.  Homemade bread with homemade butter.  Life does not get any better than that.

Happy butter-making!

Print

How To Make Homemade Butter


  • Prep Time: 5 minutes
  • Total Time: 5 minutes
  • Yield: About 4–5 ounces 1x
  • Category: Staples
  • Method: No Cook
  • Cuisine: American
Print Recipe
Pin Recipe

Ingredients

  • 2 cups organic heavy cream
  • 1/4 teaspoon sea salt (optional)

Instructions

  1. Pour cream into stand mixer with whisk attachment. Cover outside of mixer with plastic wrap to prevent splashing and turn mixer on medium high.
  2. Beat cream until the solids have separate and turned yellow, about 8-10 minutes.
  3. Strain solids from liquids using a fine mesh strainer. Take solids on your hands and squeeze until you have gotten as much liquid out as possible.
  4. If you like your butter salted, add sea salt in 1/8 teaspoon increments until it has the flavor you like.
  5. Store in covered container in the fridge – butter will keep for about 5 days or so.
about 1 tablespoon1020 g1.6 mg11.5 g7.2 g0 g0 g0.1 g30.5 mg

We love seeing what you do
with our Framed Cooks recipes.

Just tag @FramedCooks on Instagram, Pinterest or Facebook
so we can admire the deliciousness!

Hungry for More?

How To Make Homemade Ricotta

Almost No Knead Bread

915 shares
  • Facebook327
  • Twitter
  • Yummly
Kate Morgan Jackson

Hi there!  I’m Kate, and I’m a recipe writer, food photographer and devoted bacon lover.  I started Framed Cooks in 2009, and my mission is to create and share family-friendly recipes that make cooking both easy and fun…yes, I said FUN!  My kitchen is my happy place, and I want yours to be that place too.  And if you make this recipe, I would love you to tag @FramedCooks on Instagram so I can see the deliciousness!

Know someone who would love this recipe?
Click here to email them the link!

Published on May 15, 2012

Last Post:
Honey Chicken Stir-Fry
Next Post:
Easy Banana Muffins

I'D LOVE IT IF YOU WOULD RATE THIS RECIPE
(AND COMMENTS ARE WONDERFUL TOO!) Cancel reply

Your email address will not be published. Required fields are marked *

Recipe rating ★☆ ★☆ ★☆ ★☆ ★☆

Comments

Want a photo beside your name? Go to Gravatar.com, sign up for a free account, and upload a photo. It's super easy!

  1. Denise @ Creative Kitchen says

    May 15, 2012 at 10:07 am

    I love trying everything from scratch!! I make homemade whipped cream all the time…it’s one of my faves. I love seeing your pictures of how the butter separates. I’m always wondering at what point I’ve gone too far and it’s more like butter. Now I see…I’d definitely be able to tell.

    Heavy cream is so expensive…so while this tastes divine, did you find that it’d be less expensive to buy butter at the store? Just curious!

    Reply
    • Kate says

      May 15, 2012 at 1:14 pm

      It’s definitely a little more expensive than the supermarket brand, but equal to or cheaper than the fancy butters…and it tastes SO good!

      Reply
  2. Kris @ www.everywhereorange.com says

    May 15, 2012 at 1:19 pm

    thank you for showing the yucky part!!! i knew there would be a yucky part and didn’t try it for the fear of the yuck. this made it seem not so bad! i am definitely trying this, making that bread and then locking myself someplace quiet away from the hubby and my 3 year old :)

    Reply
    • Kate says

      May 15, 2012 at 1:34 pm

      You are a girl after my own heart…I think that it’s only fair that person who makes the bread AND the butter gets the first warm delicious piece. And the second…and… :)

      Reply
  3. Preppy Pink Crocodile says

    May 15, 2012 at 1:33 pm

    We used to make butter all the time as kids in mason jars. I keep meaning to try it in my stand mixer- looks so much easier than shaking a jar- ha.

    KK

    Reply
    • Kate says

      May 16, 2012 at 1:20 pm

      That’s a whole lot of shaking going on! I think the stand mixer might be a little easier. :)

      Reply
  4. Christa says

    May 15, 2012 at 1:53 pm

    You can actually use whey instead of water or milk in bread. Works great :)

    Where I’m from whey is also the main ingredient in a sweet spread and a cheese. You simply boil the whey for a loooong time until it starts to thicken and become beige. Once it thickened a bit, you remove the pot from the stove and stir until it’s cold. (That’s the important bit. Without the stirring it’ll crystallize and even if it’ll taste the same it doesn’t look fun when it’s grainy.)

    To get cheese, just boil it longer, stir until it cools off a bit and pour into a cheese mold.
    For the spread it’ll take about 5 hours to boil about 2 gallon of whey….although, that’s a lot of butter to make before you end up with 2 gallon of whey :p

    Whey spread and whey cheese has a distinct sweet flavor that you won’t find anywhere else…and it’s good for you too :)

    Reply
  5. Graham says

    May 15, 2012 at 2:35 pm

    My gran makes butter and uses the whey in her scones. Replace the milk in the scone batter with this and then spread your delicious home made butter on your delicious home made scones.

    Reply
    • Kate says

      May 16, 2012 at 1:50 pm

      My mom makes the best scones – I’m going to see if she will do this together with me next time she makes them with the whey. Thanks!

      Reply
  6. Joanne says

    May 15, 2012 at 8:54 pm

    Whenever I used to make whipped cream from scratch my mom used to forbid me from whipping too much because I’d turn it into butter…guess she was right!

    Reply
    • Kate says

      May 16, 2012 at 1:51 pm

      She was! But the butter is just as delish as the whipped cream, so it’s a win-win. :)

      Reply
  7. ruthie says

    May 15, 2012 at 8:56 pm

    I love fresh butter. It can be quite alarming if you aren’t expecting the chunk thing, though, so good that you included those pics.

    Ricotta and cottage cheese, too, IIRC, are traditionally made from whey, but like Christa’s cheese, it takes a lot of whey to get much cheese. Thus, the home recipes use milk. /;) You can also add it to soups, or pancake batters. Just about anywhere you use liquid. Although, why deprive the pup? It’s the cook’s pet’s treat. ;)

    Reply
    • Kate says

      May 16, 2012 at 1:51 pm

      I know – the dog is probably whimpering at the whole idea of me getting all these great whey suggestions!

      Reply
  8. Ralph says

    May 16, 2012 at 12:23 am

    I made butter with my kids, when they were younger, all the time. Just put whipping cream, only a little bit, in a container with a tight lid and told the kids to shake it, vigorously for a couple minutes. The kids drank the ‘ buttermilk’ right away and used the butter for breakfast next day. We all had great fun doing that :)

    Reply
    • Kate says

      May 16, 2012 at 1:52 pm

      I can imagine it being a super-fun thing for kids. Not sure I can talk my teenager into it…but I do have a year old nephew I could recruit!

      Reply
  9. Kathy Martin says

    May 16, 2012 at 9:29 am

    I love homemade butter and was super surprised to find out how easy it was. It was a YouTube video that taught me! ;) Anway, I have a zero waste tip for you…use a kitchen towel to cover your mixer instead of plastic wrap. That way you simply wash the towel and there’s no plastic wrap in the landfill! :)

    Reply
    • Kate says

      May 16, 2012 at 1:52 pm

      Kathy, I love this!!! Great idea and thank you! :)

      Reply
  10. Nancy says

    May 16, 2012 at 11:44 am

    Thanks, Kate! I will try this today, including the part about giving the whey to the dog.

    Reply
    • Kate says

      May 16, 2012 at 1:53 pm

      I’m thinking there is now one happy dog in your house. :)

      Reply
  11. Cupcake and Talk says

    May 16, 2012 at 1:15 pm

    Your are an amazing woman! Homemade bread and homemade butter? You are right it does not get better. I feel like calling my mother for some reason. A lovely post. Thank you.

    Reply
    • Kate says

      May 16, 2012 at 1:53 pm

      Aww, thank you! :) Bread and butter does make you feel like home, right?

      Reply
  12. Kate says

    May 16, 2012 at 1:23 pm

    I love it! I am DEFINITELY trying this!

    Reply
  13. Ryan says

    May 16, 2012 at 1:24 pm

    The liquid that separates from the butter is traditional buttermilk. Buttermilk you buy in the store is cultured product that more closely resembles yogurt.

    Try using the buttermilk you have left over from making butter for recipes that call for buttermilk (pancakes, biscuits etc.) I think you’ll be surprised how great it make them taste.

    Reply
    • Kate says

      May 16, 2012 at 1:54 pm

      Someone just mentioned the pancake option to me just this morning…I’m definitely going to try it. :)

      Reply
  14. Miss McBooty says

    May 16, 2012 at 3:07 pm

    I love this post. Who knew butter was so easy to make?

    Reply
    • Kate says

      May 16, 2012 at 3:45 pm

      I know, right?? First ricotta, then butter. I may never go to the A&P again. :-)

      Reply
  15. Stan Wheeler says

    May 18, 2012 at 5:26 pm

    OMG…I may never buy butter again. I bought a quart of organic cream from my local farm for $4. Then, instead of using a stand mixer I used my food processor, which is enclosed so no need for draping plastic or a towel over the mixer. Also, it’s MUCH faster… a minute and a half or two. The quart yielded over 3/4 pound of fantastic butter.
    Now I’m waiting for tomorrow to finish the no-kneed bread that accompanied your post, but I bought some local sourdough bread for tonight.
    And yes, that liquid is not whey, it’s buttermilk, and very good in biscuits, pancakes etc.
    I love your posts. Keep ’em coming!

    Reply
    • Kate says

      May 20, 2012 at 7:57 am

      Thanks Stan – I feel the same way! And today I’m going to try your food processor version…sounds even better! Happy bread and butter. :)

      Reply
  16. Charlotte Timmons says

    May 29, 2012 at 10:36 am

    I’m so glad I found this butter tutorial! We get a half gallon of raw milk weekly from a friend with milk cows. I skim off almost a full cup of cream from each half gallon! I have used it in cooking, but often, the cream goes to waste because, well, that’s a lot of cream for two of us. The butter option is divine. My cream whipped almost 30 minutes before it resembled your photo, but it strained great and tastes amazing. I will try this again until I perfect the technique. (Thanks for the plastic wrap idea, the splatter may have made this a one-time try!)

    Reply
    • Kate says

      May 29, 2012 at 3:02 pm

      Hi Charlotte! First, what a great friend to have! Second, try it next time in your food processor and see how that works – I tried it based on one of the comments below, and while the butter was a bit softer it was a LOT faster (about 2-3 minutes) and it was the same delicious flavor! Maybe that will make yours a little speedier.

      Reply
  17. mh says

    July 11, 2012 at 10:10 pm

    i find the leftover buttermilk to be absolutely delicious in mashed potatoes.

    Reply
    • Kate says

      July 14, 2012 at 10:22 am

      Mashed potatoes?? Just plain brilliant – this is going to the TOP of my to-do list!!

      Reply
  18. Chelsea says

    October 7, 2012 at 4:07 am

    I just discovered your blog, and I’ve pinned practically every recipe! I was also wondering how long the butter keeps after you make it? I would love to try this!

    Reply
    • Kate says

      October 7, 2012 at 6:20 am

      Hi Chelsea and I’m so glad you found me! As for the butter, I’v kept it for a week at a time (it doesn’t last longer than that in my house because everybody eats it up!) and it’s been just fine. :) And thank you for all the pins, hurray!

      Reply
  19. Jeanne says

    September 21, 2021 at 4:01 am

    I’d like to know how to make butter from whey. I know how to make it from cream.

    Reply
    • Kate Morgan Jackson says

      September 21, 2021 at 10:54 am

      Hi Jeanne! I’ve done a little bit of research on this, and while I’ve found lots of things you can do with the leftover whey (breads, pancakes, etc) I’ve never found anything for the home cook that shows how to make it into butter, unless you have an industrial size amount of it. I wish I could be more helpful! If you find the answer, I’d love for you to come back and tell us. :)

      Reply
  20. Joyce says

    October 10, 2021 at 7:23 pm

    Thank you! I’ve been searching everywhere for a whey butter recipe, but I see now it’s a spread. I have a lot of whey left after making cheese curds.

    Reply
    • Kate Morgan Jackson says

      October 11, 2021 at 10:48 am

      Cheese curds are one of my favorites – it’s on my list to figure out how to make those!

      Reply
  21. Lisa says

    December 5, 2021 at 7:11 pm

    Going to checkout other thing you have made. I am trying to get away from preservatives, additives,
    And artificial flavors and colors. Thank you S I type this butter is being made.

    Reply
    • Kate Morgan Jackson says

      December 6, 2021 at 11:15 am

      Thanks Lisa! Here’s a link to some of the other staples I make regularly to help us eat a little more healthily! https://www.framedcooks.com/post_course/staples

      Reply

Hi, I’m Kate! I’m a recipe writer, food photographer and devoted bacon lover. I’m so glad you’re here!

If you want to know more….

These recipes are trending up! Come see what the excitement is about!

  • Pastina with Egg and Cheese, Otherwise Known As Comfort Food
  • Pasta with Buttered Egg Sauce
  • Lemon Garlic Lobster Pasta
  • Julia Child's Filet Of Sole
  • Grandpa's Coca-Cola Ribs

Want every new recipe delivered right to your email inbox?

  • Home
  • Starters
  • Breakfast
  • Lunch
  • Dinner
  • Dessert
  • Contact
Terms of Use • Privacy Policy

Copyright © 2023 Framed Cooks
All photographs © FramedCooks and may not be used for any purpose without written permission. As an Amazon Associate I earn from qualifying purchases.

915 shares
915 shares
  • 327