
Peanut Butter Fudge Treats
These peanut butter fudge treats have a crispy rice cereal base topped with peanut butter fudge and chocolate fudge. Make a batch, and hide a few squares for yourself!

Yes, these ARE what you think they are. Rice Krispie Treats topped with peanut butter fudge, topped with chocolate fudge. Oh, baby. It’s practically too much to wrap your mind around, right?
My first piece of advice? Cut them into SMALL pieces. I go for one-inch squares. Anything bigger might make all your teeth fall out at once. In the most delicious possible way, of course! 🤓
🔎 A quick look at this recipe
🍫 What it is: Crispy marshmallow rice cereal treats topped with peanut butter fudge and chocolate fudge.
🕒 Total time: 1 hour 30 minutes.
🍬 Servings: 60 small treats.
📊 Calories: 170 per treat.
🥄 Method: Stovetop and microwave, followed by chilling.
🎉 Good for: Parties, holiday treat trays, and secret refrigerator snacks.
⭐ Why this recipe works
- 🍚 Crispy contrast: The marshmallow cereal base keeps these rich treats from feeling like one solid block of fudge.
- 🥜 Sweet and salty: Peanut butter balances the chocolate and adds a creamy middle layer.
- 🍫 Two kinds of fudge: Making the layers separately gives every bite a little of everything.
- ❄️ Chilling helps: A brief rest between layers keeps them distinct and makes cutting easier.
🥣 Ingredients you need
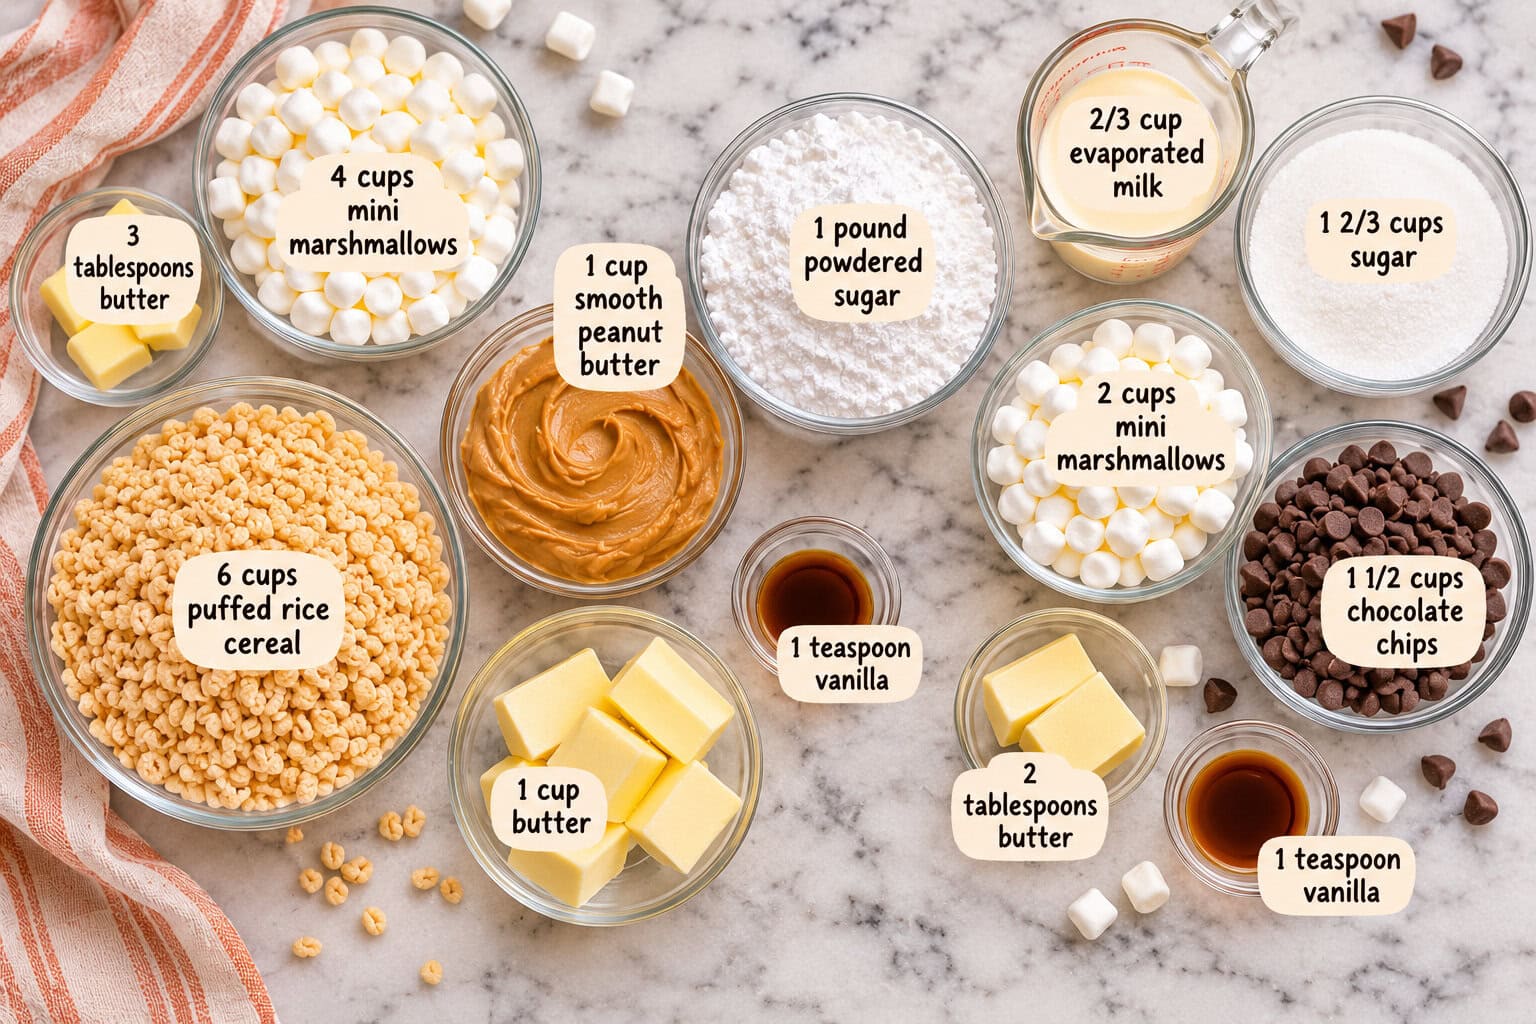
💡 Ingredient notes
- Marshmallows: Measure them before you start and melt them over low heat for so they do not scorch. 🔥
- Puffed rice cereal: Stir it into the melted marshmallows promptly, then press gently into the pan. A little cooking spray on your fingertips keeps the mixture from sticking.
- Creamy peanut butter: Regular smooth peanut butter gives the middle layer the most even texture. Save the natural, oil-separated peanut butter for your healthy PB&Js.
- Powdered sugar: Break up any lumps before stirring it into the warm peanut butter mixture for a smoother layer.
- Evaporated milk: Use canned evaporated milk, not sweetened condensed milk. They always look similar on grocery shelves but they are very different.
- Chocolate chips: Have them measured and ready to stir into the hot fudge mixture off the heat, so they melt evenly. Yes you can sample one or two!
💡 Ingredient substitution ideas
For substitutions, use the buttons below to ask your favorite AI assistant about a swap for this recipe.
See the recipe card for full information on ingredients and quantities and nutritional information.
👩🍳 How to make peanut butter fudge treats
Step 1: Melt butter and marshmallows over low heat, then stir in the puffed rice cereal. Press into a greased 13-by-9-inch pan.
Kate’s trick: lightly grease your fingers with cooking spray or butter to keep the cereal mixture from sticking to your hands.
Step 2: Microwave butter and creamy peanut butter until they are smooth. Stir in vanilla and powdered sugar, then spread the peanut butter fudge over the cereal base. You will need to smoosh it lightly with your fingers.
Step 3: Refrigerate the pan for about 15–20 minutes, or until the peanut butter layer feels firm enough to support the topping.
Step 4: Cook the chocolate fudge mixture as directed in the recipe card, stirring as instructed. Off the heat, stir in the marshmallows, chocolate chips, and vanilla until smooth. Smooth it over the peanut butter layer.
Step 5: Gently spread the chocolate fudge over the peanut butter layer. Refrigerate until firm. (This will be the longest hour of your life.) Cut into small squares and save some in a secret place for yourself!
Kate’s Tip: For especially distinct layers, make sure the peanut butter fudge is firm to the touch before adding the chocolate. And I like to store these in the refrigerator for that lovely firm fudge texture. Fudge consistency is a very personal decision!

🤔 Recipe FAQs
Yes, although creamy peanut butter makes a smoother middle layer. If you love a little crunch, chunky is worth a try!
Evaporated milk is unsweetened canned milk with some of its water removed. Find it in the baking aisle, and make sure you don’t mistake condensed milk for evaporated – they are shelved together but are very different.
Let the peanut butter layer chill until firm to a gentle touch, usually about 15 to 20 minutes.
I prefer keeping them covered in the refrigerator for a firmer fudge texture. Let them sit out briefly if you like a softer bite.
Run a knife or an offset spatula around the edges of the pan and then gently loosen with a spatula. You can cut them up right in the pan but I find popping the whole thing out and cutting on a board is easier.
Pop your question in the Comments section below and I will answer pronto!
🥣 Equipment you need
- 9 x 13 casserole: For building all three delicious layers.
- Large pot: For melting the butter and marshmallows for the crispy cereal base.
- Medium pot: For cooking the chocolate fudge mixture.
- Rubber spatula: For stirring and spreading each layer evenly.
🍫 Let’s make it!
Ready for three layers of sweet, crunchy happiness? Here is the complete printable recipe with all the exact measurements and instructions. And remember, little squares are the way to go!
Peanut Butter Fudge Treats

These peanut butter fudge treats are marshmallow rice squares with double fudge topping, and the perfect sweet and salty snack for your sweet tooth.
- Prep Time: 15 minutes
- Cooling Time: 1 hour
- Cook Time: 15 minutes
- Total Time: 1 hour 30 minutes
- Yield: 60 treats 1x
- Category: Dessert
- Method: Stovetop
- Cuisine: American
- Diet: Vegetarian
Ingredients
Rice Cereal Layer
- 3 tablespoons butter
- 4 cups marshmallows (mini marshmallows work best)
- 6 cups puffed rice cereal
Peanut Butter Fudge
- 1 cup butter
- 1 cup smooth peanut butter
- 1 teaspoon vanilla
- 1 pound powdered sugar
Chocolate Fudge
- 2 tablespoons butter
- 2/3 cup evaporated milk
- 1 2/3 cups sugar
- 2 cups mini marshmallows
- 1 1/2 cups chocolate chips
- 1 teaspoon vanilla
Instructions
Rice Cereal Layer
- Melt butter over low heat in a large pot. Add marshmallows and stir until completely melted. Remove from heat.
- Add rice cereal and stir until everything is mixed up well.
- Spray a 13 x 9 inch pan with cooking spray and press in the rice mixture (pro tip: spray your fingers with a little cooking spray so the mixture doesn’t stick to your hands!) Let cool while you make the peanut butter fudge.
Peanut Butter Fudge
- Put the butter and peanut butter in a bowl and microwave for 2 minutes on high. Stir and microwave for another 2 minutes.
- Add vanilla and powdered sugar to peanut butter mixture and stir it all up.
- Spread the peanut butter fudge over the rice cereal mixture and spread it out evenly (clean hands work best for this part!) then pop it all in the fridge while you make the chocolate fudge.
Chocolate Fudge
- Put butter, milk and sugar in a medium heavy pot. Bring to a boil and stir for 5 minutes (yes, constantly. It will be worth it.) Remove from heat.
- Stir in marshmallows, chocolate, and vanilla until marshmallows melt. Pour over peanut butter fudge, spread evenly and place in the fridge to harden (an hour or two).
- Cut into 1-inch pieces (or smaller, if you have the strength). Save some in a secret place for yourself!
✨ Variations to try!
- Extra crunch: Use chunky peanut butter for a little texture in the middle layer.
- Holiday finish: Sprinkle festive colored sprinkles over the chocolate before it sets.
- Mini party bites: Cut the chilled treats into tiny one-inch squares for a dessert platter.
🍪 More sweet treats to love!
If you love these peanut butter fudge treats, there are plenty more sweet goodies where they came from!
Try these No Bake Chocolate Haystack Cookies, whip up a batch of Payday Bars, make some of Grandma’s Peanut Butter Cookies, or treat yourself to these S’mores Refrigerator Cookies. Because there’s always room for one more little treat!
💬 Did you make this recipe?
Did you manage to save a few of these peanut butter fudge treats for yourself, or did they disappear before you had the chance? (It happens!) 😂 If you try this recipe, we would love to hear how it came out for you! Leave a star rating and tell us all about it in the comments section below.
💌 Get more easy recipes!
If chocolate and peanut butter are your love language, you are definitely in the right place! Come hang out with me in your inbox for more easy, delicious recipes, a little kitchen convo, and the occasional story about life with the Southern husband in our multigenerations house.
Sign up for the Framed Cooks newsletter here and let’s keep cooking together!
Uh oh…..these could be trouble.
This is a great idea, layering these flavors. I bet it is delicious.
I shoot with a Nikon D700 and usually a 105mm lens for my food shots. Thanks for the nice comments! (Have you guys seen the Cookie Truffles that I posted this weekend? I think they are even BETTER!) :-)
Wow these are awesome looking what kind of camera do you have, All your pictures are fabulous and I hate peanut butter….but even I would have to eat these!
Thanks everyone! The second the last one was eaten in my house, everyone started begging me for a second batch! Maybe this weekend…although I do have a cinnamon roll cake I wanted to make. :-)
This was my introduction to your blog, and, oh, my goodness! I will have to make these next week when both of my (grown) boys come home for a visit. After tasting these treats, I wonder if they will leave my kitcehn to go back to their own homes …
These look fantastic. I love each component on its own, im sure together it would be delicious!!
Your rice krispie treats look perfect. Great photo.