Beer Cheese!
This spreadable beer cheese, also known as pub cheese, is a quick and easy combo of cheddar cheese and your favorite beer, and will soon be a regular guest at all your parties! Perfect with chips or my favorite salt and pepper crackers.

Table of contents
Why this recipe works
Oh my goodness, this cheese. This is a heavenly soft and spreadable concoction of cheddar cheese, beer and a few other goodies that you whiz up in your food processor.
It’s the appetizer I go to when I need something scrumptious and spreadable that is ready in ten minutes. Football games, tailgate parties, something to snack on when you really just want a nibble and a glass of wine…beer cheese!
And I bet you already have most of the ingredients in your fridge!
Ingredients you need for this recipe
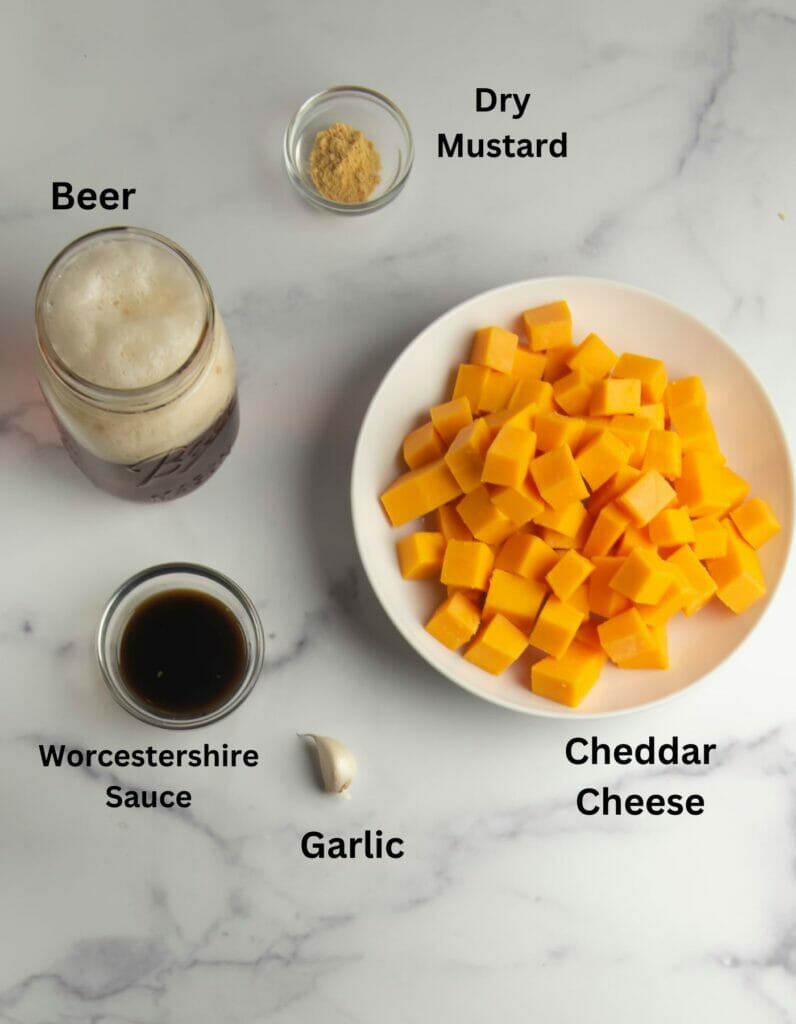
Ingredient Notes

Here’s how you make this recipe
STEP 1: Bring a big hunk of your personal favorite cheddar to room temperature and chop it up into chunks.
STEP 2: Drop them into your food processor and let it rip – you want to process it until the cheese is pretty smooth.
STEP 3: Once your cheese is processed, you are going to toss in some garlic, a little Worcestershire sauce and some dry mustard. Process, process.
STEP 4: Now for the beer. Take your open bottle firmly in hand, and slowly pour the beer through your food processor’s feeding tube.
Here’s where the art of making beer cheese happens, because you want to put in enough beer to make it fluffy and spreadable, but not so much that it is soupy.
This pretty much means that you are going to need to do a decent amount of sampling. Pour in a little beer, turn off the food processor, taste a little cheese, put the lid back on, pour in a little more beer. Repeat as needed.
(I know…it’s a tough job, but somebody has to do it.)
Now, you pretty much can’t get this wrong, because the perfect consistency is however YOU like it best. If you overshoot the beer and you feel like you’ve made it too fluffy or thin, just toss in a little more cheese.
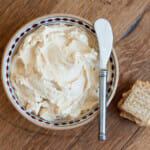
But really, if you are responsible about the testing and you add the beer in increments, you will do just fine, and about ten minutes after you start this whole process you will be sitting down with the remaining beer and a cracker that looks like this:

And all will be right with the world. Beer cheese!
FAQs for this recipe
Yes it can! Bring it to room temperature before you serve it so that it is nice and spreadable.
Whatever kind you like best. I prefer a lighter beer for this recipe, but it works with all kinds. The beer flavor will impact the overall taste, so choose wisely.
Beer cheese will keep for at least a week in your fridge – put it in a covered container so it doesn’t dry out. If you have enough left over, it makes an AMAZING version of mac and cheese…heat it in a pot with some milk until it starts to get a sauce-like consistency, and then stir in some cooked macaroni.
Pop your question in the comments section below and I will answer pronto!
Could you leave us a review?
If you try this recipe, we would love to hear how it came out for you! I’d be super grateful if you could leave a star rating (you pick how many stars! 🌟 ) and your thoughts in the Comments section.
Beer Cheese!
This spreadable beer cheese is a quick and easy combo of cheddar cheese and your favorite beer, and will soon be a regular guest at all your parties!
- Prep Time: 10 minutes
- Total Time: 10 minutes
- Yield: Makes a good 1 1/2 to 2 cups of cheese! This keeps well in the fridge, but let it come to room temperature before serving.
- Category: Appetizer
- Method: No Cook
- Cuisine: American
- Diet: Vegetarian
Ingredients
- 1 pound sharp cheddar cheese, room temperature and cut into chunks
- 1–2 cloves garlic, peeled
- 2 tablespoons Worcestershire sauce
- 1 teaspoon dry mustard
- 6 ounces of beer (about 1/2 bottle or can)
Instructions
- Put cheese into food processor and process until cheese is chopped finely.
- Add garlic, Worcestershire sauce and mustard and process until blended well with the cheese.
- With the processor running, pour the beer in small increments into the cheese mixture. Turn off the food processor after each addition to check the consistency – you want the cheese to be soft and spreadable. You should also push the cheese down from the sides with a spatula each time you check it. You will probably not need all the beer, but use as much as it takes to get the cheese the consistency that you like!
- Serve the cheese with crackers, cut up celery or anything else you like – and don’t let the leftover beer go to waste!
Notes
Garlic: The garlic flavor is front and center if you use both cloves (which I love!) but if you want it more subtle, stick with one clove.
Cheese: You can go with mild, regular or sharp cheddar cheese. Use the block kind, not the pre-shredded.
Beer: Any kind will work. I like milder beer for this recipe, but use your favorite!
This recipe is always a big hit, anytime. It’s very versatile too. I also make it with Philly cream cheese and bacon bits.
Cream cheese – I love that idea! And of course everything is better with bacon. :) :)
Just in time! Between Spring Training and World Baseball Classic I’m pulling an all-dayer with the tv today. Since hubby has to work we can’t make it to any of the spring training games going on all around where I live. :( I need to self medicate with yummy food. I have to side with the southern hubby today, we share a favorite team. But, to be diplomatic… Go USA!!
Go USA sounds just perfect to me! Hurray for baseball season!
being from ky and all …..try adding some red pepper….cayenne to the next batch and see what you think. :)
Red pepper! I’m there! :)
Thanks for this, Kate. I can always count on you to give me something to do over the weekend.
You are so welcome! I love experimenting with new recipes on the weekend when I have lots of time to spread out around my kitchen. :)
I love how you’ve used beer to turn cheddar into something spreadable! So yum.
It’s a match made in heaven – cheese and beer!
PS… I clicked through all of your fun links!
I will keep my eyes out for a Landshark(love the name!)
and oh good grief… the Mason Jar looks amazing!!
What a spread and looks like a fun, local spot!
Great post Kate! Are you home yet?
It’s a great place – I got back last night and guess where we went for pizza and bbq? :)
Sounds like a great baseball snack!
So happy that Baseball is back !
(tuning in daily to Spring Training!)
I’m a Black and Orange gal… Goooo
SF Giants!
Have some company coming in a couple of weeks they will love it!
Let’s go Mets! And let’s go beer cheese!! :)