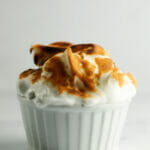
Easy Mini Baked Alaskas
This super easy recipe for easy mini Baked Alaskas means everyone has their own portion of this classic and dramatic ice cream dessert!
- Prep Time: 20 minutes
- Chilling Time: 3 hours
- Cook Time: 1 minute
- Total Time: 3 hours 21 minutes
- Yield: 4 1x
- Category: Dessert
- Method: No Cook
- Cuisine: American
- Diet: Vegetarian
Ingredients
- 4 slices of pound cake
- 2 cups of your favorite flavor ice cream
- 4 egg whites
- ½ cup sugar
Instructions
- Cut the pound cake slices into shapes that will fill your ramekins. I usually cut each slice in half, put one on top of the other and then just smoosh them down into the ramekin until they come about halfway up the inside.
- Fill your ramekin to the top with your favorite flavor of ice cream and smooth it out (I put my fingers inside a sandwich bag to both smooth the ice cream in the bowl and to smoosh it into place in the ramekin).
- Use a tissue (works MUCH better than a paper towel) to clean up any ice cream drips on the side of your ramekin and pop it in the freezer. Repeat this whole fun process with the remaining ramekins.
- Freeze your Alaskas until they are totally solid – I usually make them the day before I am going to serve them, but they need at least several hours of freeze time.
- Time for the dramatic part! If you have a cooking torch, get it out, otherwise turn your broiler on. Take your frozen Alaskas out so they are all ready.
- Put the egg whites and the sugar into a bowl and mix on high speed until they form soft peaks. Use a spatula to “frost” the ice cream with the egg white mixture, covering it all up as best as you can.
- When all the ramekins are frosted, either toast the egg white mixture with your cooking torch until it is golden browned, or put the ramekins on a rimmed baking tray and pop them into the broiler, watching them THE ENTIRE TIME to make sure you take them out as soon as they are golden.
- Serve at once! With flair!
Notes
Cake: This recipe calls for pound cake, but you can swap that for angel food cake or sponge cake if you want your Alaskas to be a little lighter…or brownies if you want them to be extra decadent!
Ice Cream: As long as you are using something that will freeze solid (in other words, no soft serve anything) you can use any flavor of ice cream, or sorbet, or frozen yogurt.
Ramekins: These are little individual baking dishes that are oven-safe, and they are also great for cooking prep bowls.
Baking Torch vs Oven: I prefer the baking torch to brown my Alaskas because it gives you total control over the browning process (and because it is fun to use) but if you don’t have one, your broiler is going to work just fine.
Find it online: https://www.framedcooks.com/easy-mini-baked-alaskas/
